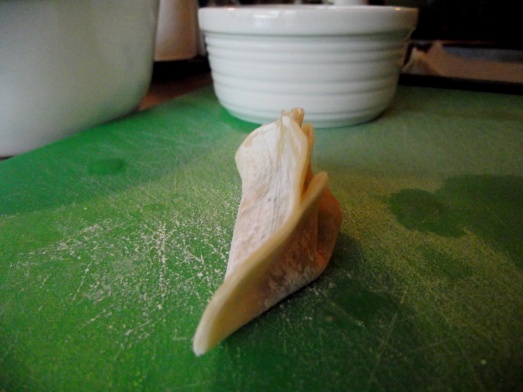
Soft Pretzel Twists

I’m not even going to gum up this post with a whole schpeal about how everyone loves soft pretzels and how easy these are to make and how they taste exactly like the famous Auntie Anne’s pretzels from the mall, though all of those things are true.

I’ve searched for the perfect pretzel recipe for years and this year, I finally found it and now I am finally ready to share it. Not like it was a huge secret, but you know, whatever. This pretzel is slightly sweet and can be topped with cinnamon and sugar, or brushed with garlic butter and dipped in melty cheese. I suggest both.

Whole Wheat Soft Pretzel Twists

2 cups milk
1 1/2 Tbs active dry yeast (2 packets)
6 Tbs brown sugar
4 Tbs butter, room temperature
3 1/2 cups white flour, plus 1/2 cup as needed
1 cup whole wheat flour
2 tsp salt

1/3 cup baking soda
2 cups warm water

Melted butter (for brushing onto the fresh pretzels)
Dipping Sauce (optional)

Preheat your oven to 450 degrees.

1. Warm the milk on the stove or in the microwave until it is 110 degrees, pour into a large bowl and whisk in the yeast until it is dissolved. Let it sit for 5-10 minutes. It should have little bubbles around the bowl.

2. While your yeast is working, mix together the flours, brown sugar, salt and butter in a bowl. The easiest way to blend in the butter is with your fingers, rubbing them together until the butter bits are flaky and well blended.

3. Whisk your flour mixture into your yeast mixture one cup at a time until you have no choice but to use a wooden spoon. Towards the last 1/2 cups of flour, the mixture will get very tough and you will have to start kneading. Folding and pressing the dough onto itself and working in any loose flour. If the dough is too wet, sprinkle it with more flour. It’s up to you. You’ll knead for about 5 minutes and you’ll know you are done when the dough is no longer wet and sticky and forms into a nice ball.

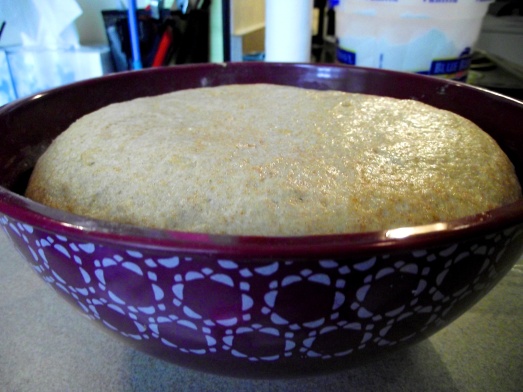
4. Grease a large bowl with a little bit of oil and put in your dough ball. Cover with plastic wrap and put it somewhere warm for an hour. I like to put it on top of my stove. When the hour is up, the dough should have doubled in size.

a

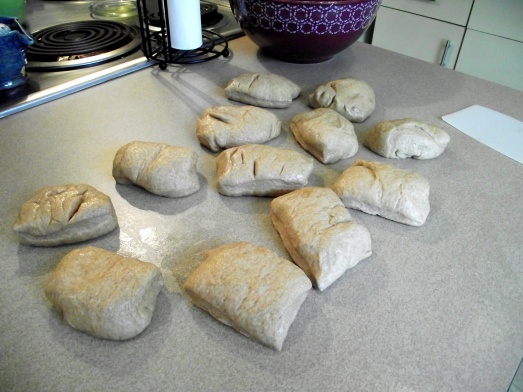
5. Right now the dough is full of air, so punch it down to make it a little more manageable. Split the dough into 12 equal pieces.

one punch.

one punch.

many punches! The dough will begin to immediately deflate.

many punches! The dough will begin to immediately deflate.

d

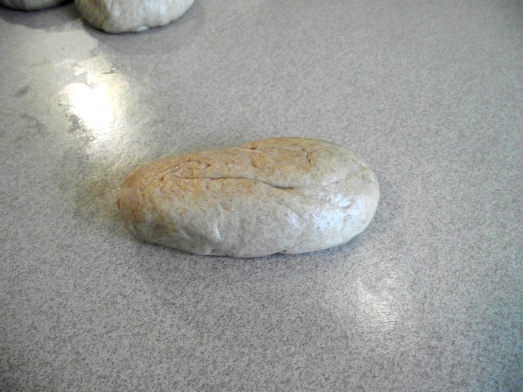
6. I roll the chunks into balls, which makes them easier to roll into the rope shape. From here on, I do not use flour on my counter top. The flour leaves everything too slick and the dough doesn’t stay in the shape you want. The counter top allows natural friction for excellent shaping.

e

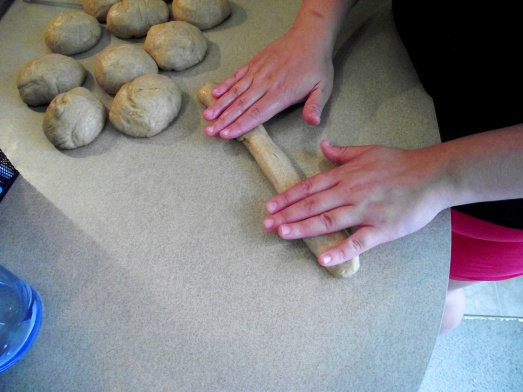
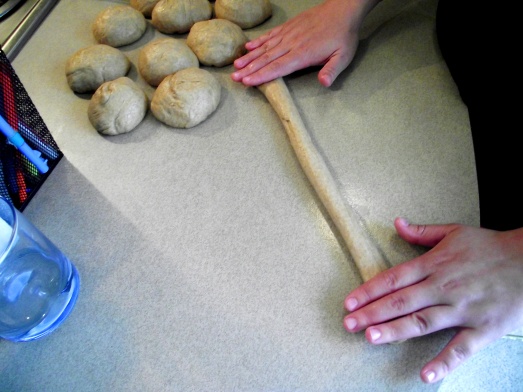
7. Roll the smaller chunks into long ropes. If you want to get technical, they were around 25 inches long.

turn the ball into a small log before rolling

turn the ball into a small log before rolling

roll beginning in the middle and working your way to the ends

roll beginning in the middle and working your way to the ends

h

i

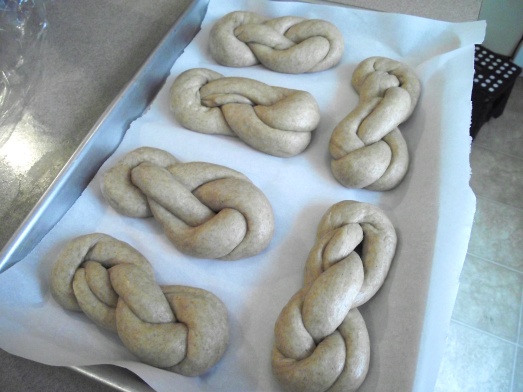
Pick up the rope and put the two ends together and twist the dough onto itself, leaving an open loop at the end.

j

To make the twist complete, put the joining end through the loop and twist once. Bam! Pretzel twist.

k

l

m

8. Put your finished twist onto a sheet tray while you work on the others.

n

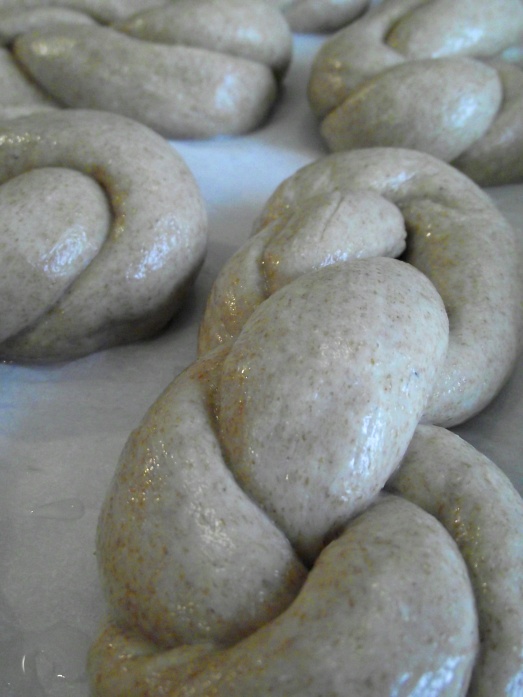
9. Once all of your twists have been completed, take your warm water and dissolve the baking soda into it. Dunk your twists onto the water mixture and put back on the sheet tray. The baking soda gives your pretzels that pretzel-y crust. Sprinkle on some salt at this time if you’d like.

right after baking soda wash

right after baking soda wash

with a sprinkling of salt

with a sprinkling of salt

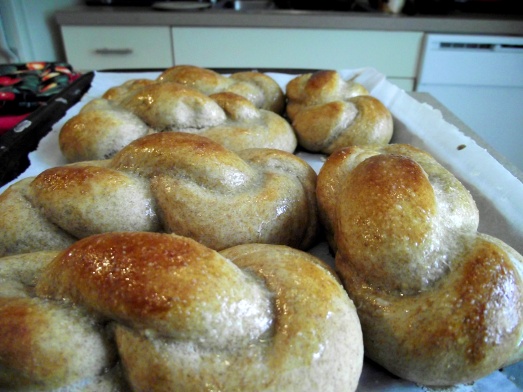
10. Let your twists sit and rise for 10 more minutes before baking. Then get those suckers in the oven for 7-9 minutes or until golden brown and brush with melted butter.

q

r

Go ahead and dip them in cheese dip, marinara sauce or some more melted butter.

Enjoy!


Overnight Refrigerator Pickles

I figure two months was the perfect amount of time for you all to wait for this post.

Why?

h

Because it’s about pickles!! And summertime is infamous for it’s fabulous farm-fresh vegetables. The problem with this is the quantity of vegetables, which is always a large quantity. You get all excited and take them home, then they start looking kind of sad in the bottom of your refrigerator, and then you start seeing your hard-earned dollars melt away into a sludgy goop in the vegetable drawer. I don’t know about you, but that makes me sad. An awesome thing about pickling, is that it preserves your beloved veggies! So, if you know that you aren’t going to use those two cucumbers before they go bad, just pickle them.

I originally found the recipe for these Overnight-Bread and Butter Pickles at The Burlap Bag blog. I liked the recipe but the thing I loved the most was the method. You’ll see what I mean once we get into it.

Not only will we be pickling cucumbers, but radishes as well. I bough a bunch at the farmer’s market the other day, and boy are they spicy. Hopefully the pickling solution will take out some of the spiciness.

*Disclaimer: radishes tend to have a funny smell once they are pickled, but otherwise they taste great. It’s not for everyone, so I understand if you don’t want to try this out.

Overnight Pickles

2 large cucumbers
1 cup vinegar
1 cup water
1/2 cup sugar
1 Tbs salt + 1 tsp
1/4 tsp turmeric- this gives the pickles that yellow tint
1 tsp celery seed and/or mustard seed

1. Slice your cucumbers to the desired thickness. I have a mandolin, which makes this a lot easier.

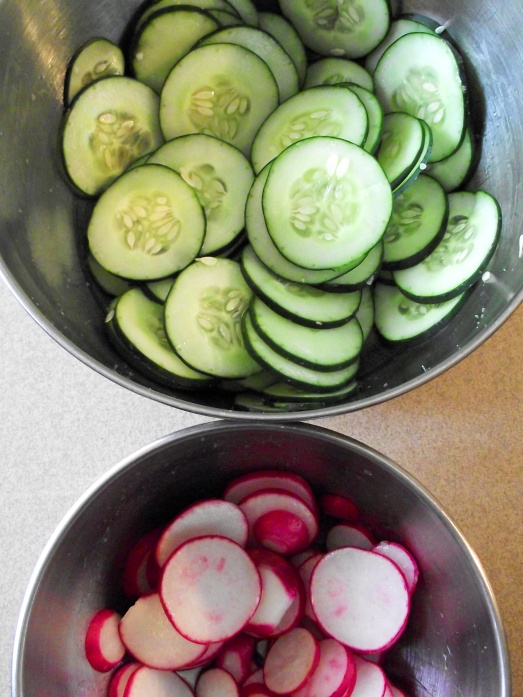
Radishes and cucumbers with the salt soak

Radishes and cucumbers with the salt soak

2. In a large bowl, mix your cucumbers with the 1 tsp salt and let them sit for at least an hour. This is my very favorite part of the method. The salt draws moisture out of cucumber, which will then give us a crunchier pickle! It’s true. Science.

Excess water from the radishes

Excess water from the radishes


excess water from the cucumbers

excess water from the cucumbers

3. After the hour, rinse your pickles well with water. While you are rinsing, put the rest of your ingredients in a small saucepan on the stove and boil it.

pickling liquid

pickling liquid

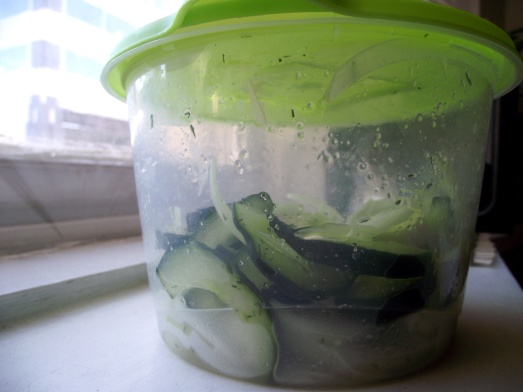
4. Once the mixture has boiled, pour it over your rinsed pickles. Put them in a sealed container and stick them in the fridge to hang out overnight. The next day, you will have some delicious pickles.

e


f

As always, make the recipe your own! This recipe produces a sweeter pickle, but if you don’t like sweet pickles, then cut down your sugar to equal your salt. Add some red pepper flake for spice, or garlic for a zesty flair.

g


One note if you decide to add raw garlic: if you put it in your boiling liquid, then it will turn blue. There is nothing wrong with it, it is still very edible, but it will be a distinctive greenish/blue color. You can try to combat this by putting the garlic in after your solution has cooled down, but even then it is not a guarantee.

Enjoy!
Red Pepper and Pesto Pizza

What am I having for lunch today? Something delicious. And dare I say it- kind of fancy.

pizza7

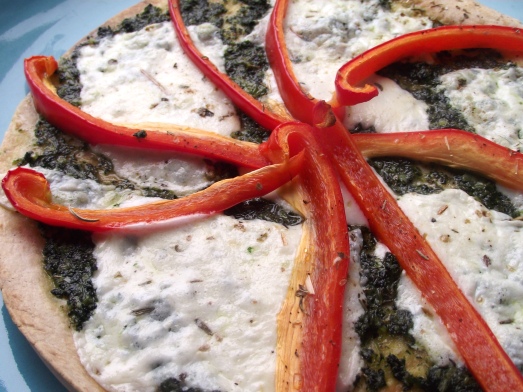
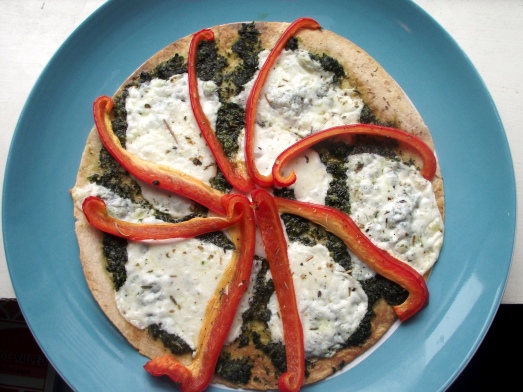
Red pepper and pesto pizza!

You may think that it is out of your league, but it isn’t. You can even make your own pesto!

Now, a traditional pesto is made with fresh basil, parmesan cheese, pine nuts, garlic, lemon juice and olive oil. Since I had none of those things on hand, I chose to make spinach pesto. Not only does it taste just as delicious as the original, it is cheaper because I used frozen, pre-chopped spinach. This is also a great way to sneak in veggies, which we all need more of.


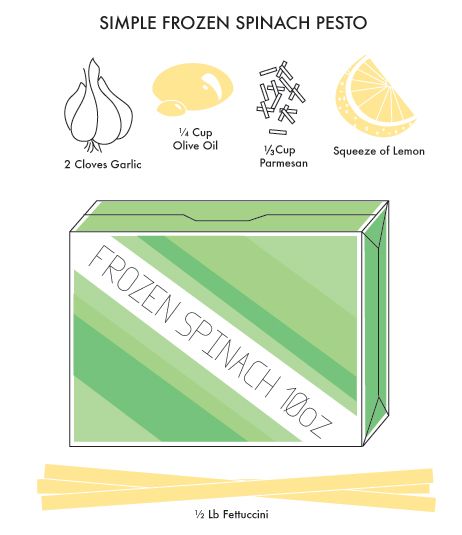
Handy spinach pesto diagram

Handy spinach pesto diagram found on Pinterest


All you need to do is put all of your ingredients in a food processor or blender and whiz it up! You can use it as a replacement pizza sauce like I am doing today, pasta sauce, sandwich spread, veggie dip, on your morning eggs, and the list goes on and on. Google it. The uses are endless. If you’re having a hard time using up the whole batch it freezes beautifully in a ziplock bag.

Back to this drool-worthy pizza.

Lazy lunches are my favorite so instead of making dough, I use two flour tortillas. They make the pizzas a perfect individual size.

Step 1: Make your spinach pesto (or you can use store bought if you really really feel like it). While you’re getting your pesto put together, preheat your oven to 350 degrees.

pizza1

Step 2: Put the tortillas on a baking sheet lined with parchment paper and spray lightly with an olive oil spray.

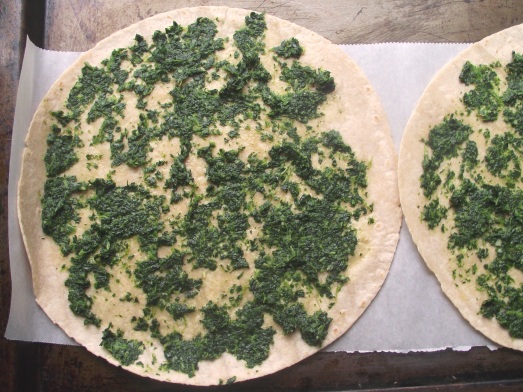
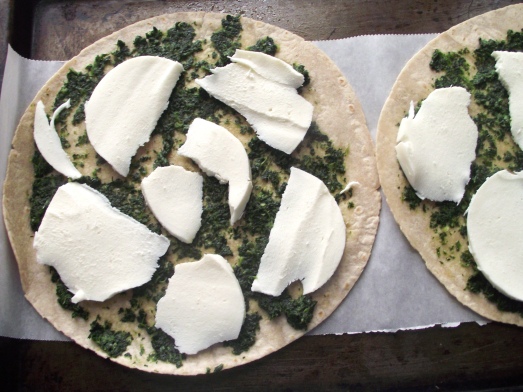
Step 3: Spread the pesto on your tortillas. No need to gob it on since the flavor is strong, but a nice thin layer should be the perfect amount.

pizza2

Step 4: Layer on your mozzarella cheese. I spoiled myself this week and bought fresh, but feel free to use frozen.

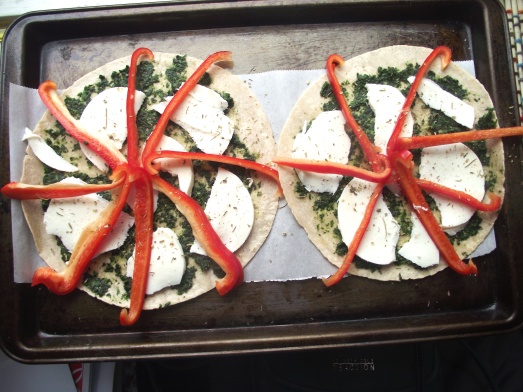
pizza3

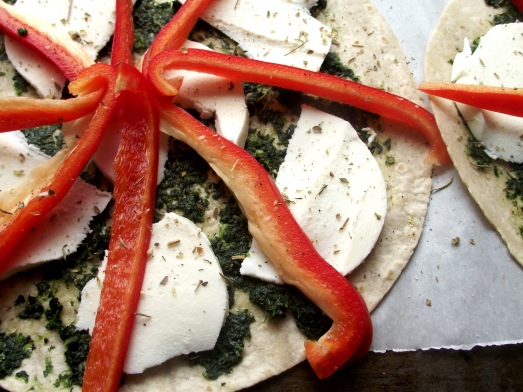
Step 5: Add sliced red peppers. I admittedly just threw them on there to begin with, but decided to make the design a little prettier for you all. I also sprinkled on some Italian seasoning, salt, and pepper. Red pepper flake would also be amazing.

pizza4

Remember, everyone, salt and pepper are the best seasonings you will ever find in your kitchen.

pizza5

Step 6: Bake your pizzas for 10-15 minutes, or until your cheese has melted to your likeness then eat!

pizza6

Mmmmm… fancy pizza. If you want to make this for a larger crowd, use your favorite pizza crust instead of the tortillas. You may also add any other veggies or favorite pizza toppings!

pizza7

Enjoy!
Refresh Yourself and Your Side Dish

Vegetables can be boring. Especially raw vegetables.

e


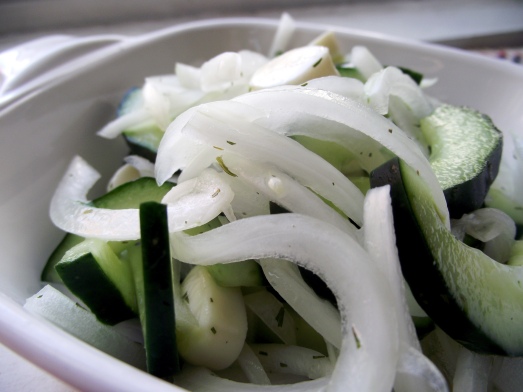
We all should eat more, so here is a recipe to help with that. This single serving recipe is perfect for a snack or a side dish. Pair it with grilled chicken and you have a tasty light lunch. I use cucumbers and onions in mine, but you could easily add your favorites. Tomatoes or peppers would be excellent additions. It makes veggies a little more appealing by adding some extra flavor and cheese. Because everyone loves cheese.

If you say you don’t, I don’t believe you.

Cucumber, Onion and Mozzarella Salad

1/3 cucumber
1/2 small onion
1 Mozzarella String Cheese
1 tsp sugar
1/2 tsp salt
1/4 tsp dried dill or mint
1 tsp extra virgin olive oil

1. Cut up all of your vegetables and cheese into thin slices. I scoop the seeds out of my cucumber so the salad doesn’t get too watery. Put all of the veggies in a tupperware container or bowl.

a

2. Sprinkle the rest of the ingredients over the vegetables and cheese and mix it all around. I put mine in a tupperware container so I could shake it around and save myself dirtying a spoon. Go ahead and let the mixture hang out in the fridge for at least an hour.

b

3. Take it out and enjoy! This is also a great recipe for summertime potlucks.

c


d


Biscotti Makes Everything Fancy

Nothing sets a delicious cup of coffee off like a crunchy chocolaty bite.

a


At this very moment I am sipping and dipping and typing.

Biscotti is fancy. Is it a cookie? Is it a sweet biscuit? Who knows. However, on the shelves, they are expensive. In a coffee shop, they are expensive. The best way to enjoy a mound of biscotti is to simply make it yourself. This is the first time I’ve ever made it, and I was thrilled with the results.

The initial batter resembled brownie batter. I wasn’t sure what to expect, but the fact that it was so thin scared me. Luckily, it all worked out for the best. Because after it was spread onto some parchment paper and baked, it came out like a mini crusty chocolate loaf. Once it cooled for twenty minutes on a rack, the biscotti cookies were cut from the loaf, then baked again until they were dried and crispy. To top it off, the cookies were dipped in delicious chocolate ganache.

b

Yummmmm.

Please, let’s get to the recipe.

Chocolate Pecan Biscotti

1 cup flour
1/3 cup cocoa powder
1/2 cup brown sugar
2 Tbs butter, room temp
1/4 tsp baking soda
1/4 tsp salt
2 eggs
1 egg yolk
1 tsp vanilla extract
1/4 cup strong coffee

1/2 chocolate chips
1 cup chopped pecans

1. Preheat oven to 350 degrees and toast the nuts for a few minutes. As soon as you start smelling them, they are done. Leave them out to cool as you work on the rest of your batter.

2. Mix flour, cocoa, sugar, room temp butter, baking soda and salt in a large mixing bowl until the butter is disperced throughout the mixture. It should seem kind of crumbly. You can do this with a fork or with a pastry blender.

3. Add the eggs, yolk, vanilla and coffee and mix until just blended.

4. Time for the add-ins. I used chocolate chips and the toasted pecans. Fold these into your batter until it is all incorporated.

5. Pour the batter onto a large cookie sheet with greased parchment paper. Using a rubber spatula push the batter into a rectangular shape, and until the thickness is around one inch thick. Bake for 20 minutes, rotating halfway through.

6. Cool the loaf on a cooling rack for 20 minutes and reduce the oven temperature to 250 degrees.

7. Once it is cooled, cut 1/2 inch strips from the loaf, lay them on the same cookie sheet and bake in the oven for an hour. It helps to flip the cookies a few times while baking.

Cool the cookies and enjoy!

Or…

If you’d like them to be super special, you can dip them into ganache.

Ganache

1 cup chocoalte
1/2 cup heavy cream
1 Tbs butter

1. Take a small sauce pot and simmer about an inch of water in the bottom.

2. While the water is simmering, place a heat-proof bowl on top of the pot, making sure the bottom of the bowl does not touch the water. Put the chocolate and the cream in the bowl and constantly stir until the chocolate is melted and the cream is incorporated.

3. Remove the bowl once the chocolate is fully melted and stir in the butter until it has melted in. The butter will make the chocolate nice and shiny.

4. Dip your cookies into the ganache and set on parchment paper until the chocolate has hardened.

c

Now go make some coffee and biscotti! Invite some friends over. They will be impressed.

Apples and Bacon and Brie… oh my!

It is cold and rainy in Kansas City today, and my stomach screams for comfort food.

Mac and cheese, chicken noodle soup, roasted potatoes are some of my all time favorites and grilled cheese is right in line with them. Instead of going for the American cheese variety (which is delicious, but kind of lame), I have opted for a fancier version.

Apples, turkey bacon, brie and dijon

Apples, turkey bacon, brie and dijon

Behold! The apple, bacon and brie grilled cheese.

a

It’s just delicious. I used turkey bacon, tart apples, slices of brie and a splash of dijon. Had I felt more productive I would have caramelized some onions.

b

That sandwich is stacked.

That sandwich is stacked.

Instead of the regular ho-hum lunch, go for something a little different! Put a spin on your standby. You’ll be glad you did.

eEnjoy!
 

Potstickers. Need I say more?

Let’s make some Asian dumplings because everybody loves them!
Plus, they are actually very easy to make and cost efficient. And though they are slightly time consuming, they are worth it.

Asian Turkey Dumplings with Ginger Dipping Sauce

Yield 40-50 dumplings

10 oz ground turkey
1 Tbs cilantro, chopped
1 Tbs scallions, diced
1 tsp grated ginger, fresh
1 tsp vinegar
1 tsp soy sauce
1 tsp oyster sauce
¼ tsp sugar
¼ tsp sesame oil
Wonton wrappers, square or round

Combine all ingredients together and marinade at least 30 minutes before folding the dumplings.
If you don’t have ground turkey use whatever you have on hand. Ground chicken, ground pork, even finely diced shrimp will work perfectly in this recipe.

Ginger Scallion Dipping Sauce

3 Tbs soy sauce
2 Tbs cilantro, chopped
2 Tbs grated ginger, fresh
2 Tbs scallions
1 Tbs vinegar
¼ tsp red chili flakes
¼ tsp sesame oil

Mix all ingredients together and marinate while the dumplings are being folded. You can keep any leftovers in the fridge. I highly urge you to to buy fresh cilantro and fresh ginger. It really makes all the difference!

I’m not joking.

Do it.

Now that you have the ingredients, let’s assemble. All you’ll need is your filling, a small bowl of water and the wonton wrappers.

Step 1: Take your wonton wrapper and put a teaspoon of your filling in the center. If you overfill it, you won't be able to fold it.

Step 1: Take your wonton wrapper and put a teaspoon of your filling in the center. If you overfill it, you won’t be able to fold it.

Step 2: Dip your fingers in the water bowl and wet the edge of your wrapper.

Step 2: Dip your fingers in the water bowl and wet the edge of your wrapper. You’ll want to work quickly. The water acts as glue to keep the folds sealed.

3e

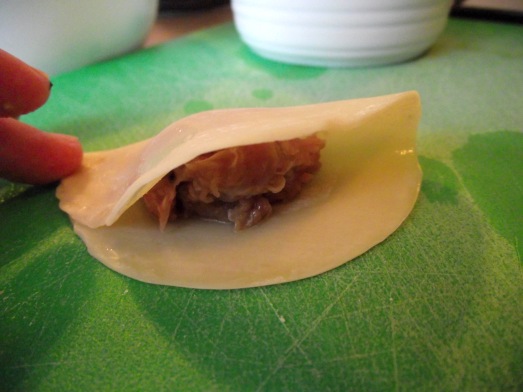
Step 3: Fold your wrapper over your filling, and starting on one side, seal the corner by pressing lightly.

3f

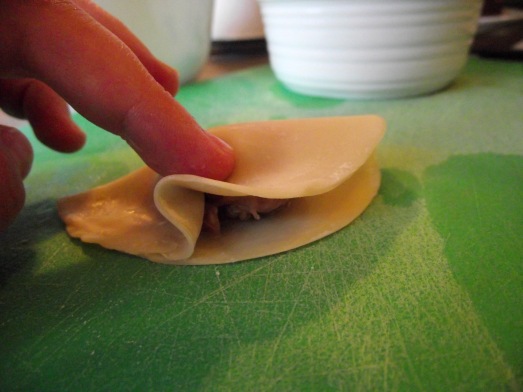
Step 4: Once one corner is pressed down, it is time for the first pleat (or fold). Make it small because you will be doing three folds on your dumpling.

3g

Step 5: Your second pleat will be made immediately after the first, pressing them down along the way to seal the dumpling well.

Step 6: The third and final fold.

Step 6: The third and final fold.

Step 7: Seal it completely by pressing the last open edge together, just like the beginning.

Step 7: Seal it completely by pressing the last open edge together, just like the beginning.

Step 8: Stand the dumpling up and smoosh the bottom down a bit so it can stand on its own.

Step 8: Stand the dumpling up and smoosh the bottom down a bit so it can stand on its own.

As you can see, one side will be flat and the other will have the pleats. Don't freak out if your pleats are not evenly spaced. It's not a big deal because they will taste delicious anyway!
As you can see, one side will be flat and the other will have the pleats. Don’t freak out if your pleats are not evenly spaced. It’s not a big deal because the dumplings will taste delicious anyway!

Eventually, you will have a lot of dumplings.

Eventually, you will have a lot of dumplings.


I made all of mine ahead of time and kept them in the fridge until later that night. You can also freeze them on a sheet tray, then put them into freezer bags for storage for a couple of weeks. They are great for dinner parties and even better when your guests help you make them. Once you get into the rhythm of folding, the work will go by very quickly.

When it comes to cooking these beauties you have many options. Steaming, frying, poaching, etc. My favorite way is to pan fry them first, then steam them in the same pot to finish cooking them off. Hence the name “potsticker”.

It goes a little something like this.

1. Get a large nonstick pot or saute pan and put a couple of Tablespoons of vegetable oil in the bottom, heated to medium high heat. You want enough oil to completely cover the bottom, but not so much that your potstickers are drowning in the stuff.

2. Put the dumplings in, but do not try to crowd them all in at once. I do mine in two batches, and keep the first batch in the oven to keep warm at the lowest setting.

3n


3. Fry the dumplings until the bottoms are golden brown, then add 1/2 cup of water to the pan and immediately cover the pan with a lid. It is best to do this quickly, otherwise you will have hot oil flying everywhere. Have that lid ready!

4. Steam the dumplings for 5-7 minutes or until the water is all gone. Take the lid off and leave on for one more minute to achieve optimum browning.

Then, take them out and share with people you care about.

Because, really, you went through all of that folding, so whoever is eating them better appreciate it.

Enjoy your dumpling feast!


Chipalicious

Hey! Do you like pita chips?

8

Of course you do.

Just like me, you probably don’t like paying $3+ for a bag of this salty treat. With a few simple ingredients you can make cups and cups of this stuff versus the few portions you get in the bag.

You can do this.

What You Need
1 package pita bread

olive oil (roughly 1/4 cup)

salt

garlic powder or other seasonings

A nice bread knife

You need these things.

You need these things.

Preheat oven to 300 degrees

1. Cut the pita in half, horizontally. This will separate the two halves of the bread. You will really only need to cut the edges, since the center of the pita has a natural pocket of air. Keep the two pieces together.

1

If you want you, you can skip this step and just cut the pita as it is. However, by cutting the pita bread in half, you are getting double the amount of chips! Double your chips for free? It’s worth the extra step.

2

2. With the two matching pieces together, cut it into 1-2 inch wide strips. It all depends on how big you want your chips. Do your best to keep all of the pieces matched together.

3

3. Flip the bread 90 degrees, and cut against the strips, creating squares. Collect all of your squares in a bowl.

4

4. Get a sheet tray or two, depending on how many pita chips you are planning to make, and line them with foil (easy clean-up). Pour all of your cut up pita evenly onto the trays and drizzle the olive oil onto them. Before you mix them up, season them well with the salt and garlic powder, or whatever else you decided to use. Now- mix! Just use your hands. They’re your best utensil.

6

5. Bake for 45 minutes to 1 hour, mixing the chips every 10 minutes or so. You will know they are done once they are crisp and slightly brown. Mine look very brown because I used whole wheat pita bread.

7

So Good! 9

Now, go buy yourself some pita bread and start experimenting with different seasonings! Try some rosemary garlic or chili pepper pita chips. I know I will the next time I whip up a batch of these.